ZStack v1.2 release
Hello everyone, I am Frank Zhang, the architect of ZStack. Today I am happy to announce that ZStack v1.2 is released.
New Features And Enhancements
- Distributed EIP
- Shared Mount Point Primary Storage
- Database Periodical Backup
- Systemd Support
- KVM Cache Mode
- AWS EC2 Like Userdata
Installation And Upgrade
1. Distributed EIP
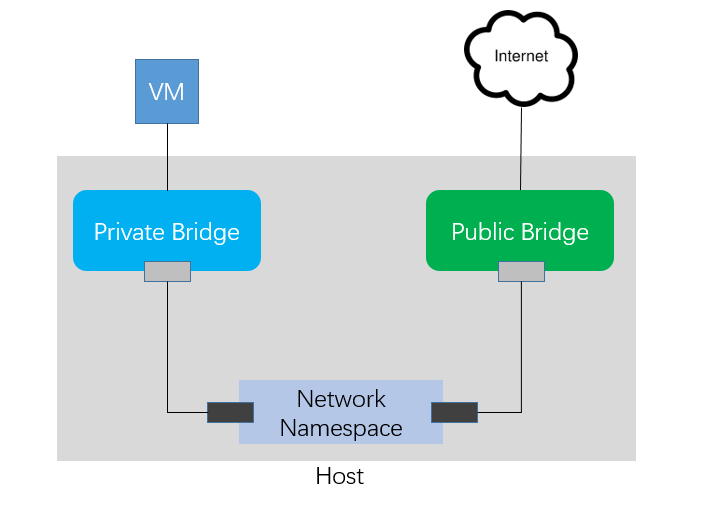
Distributed EIP is added as a new service type of flat network provider in this version. Users can apply an EIP(normally a public IP) to a VM on a private network dynamically without using a virtual router VM, since the EIP is created on the host where the VM is running. As the EIPs are scattered on different hosts we call it distributed EIP. Below is an overall architecutre showing that the distributed EIP is implemented through the Linux network namspace.
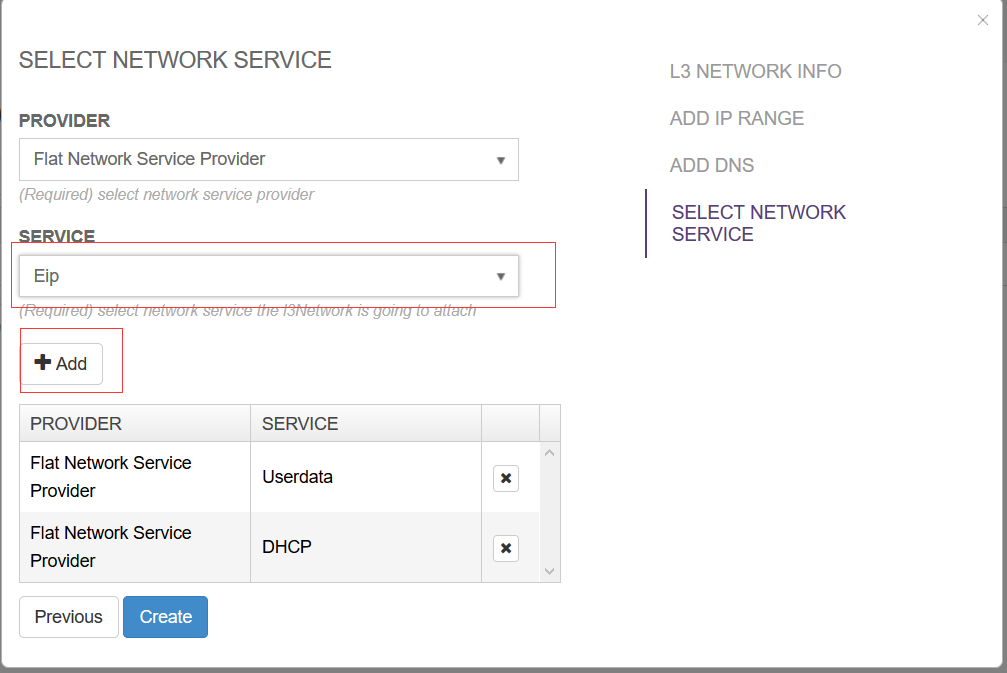
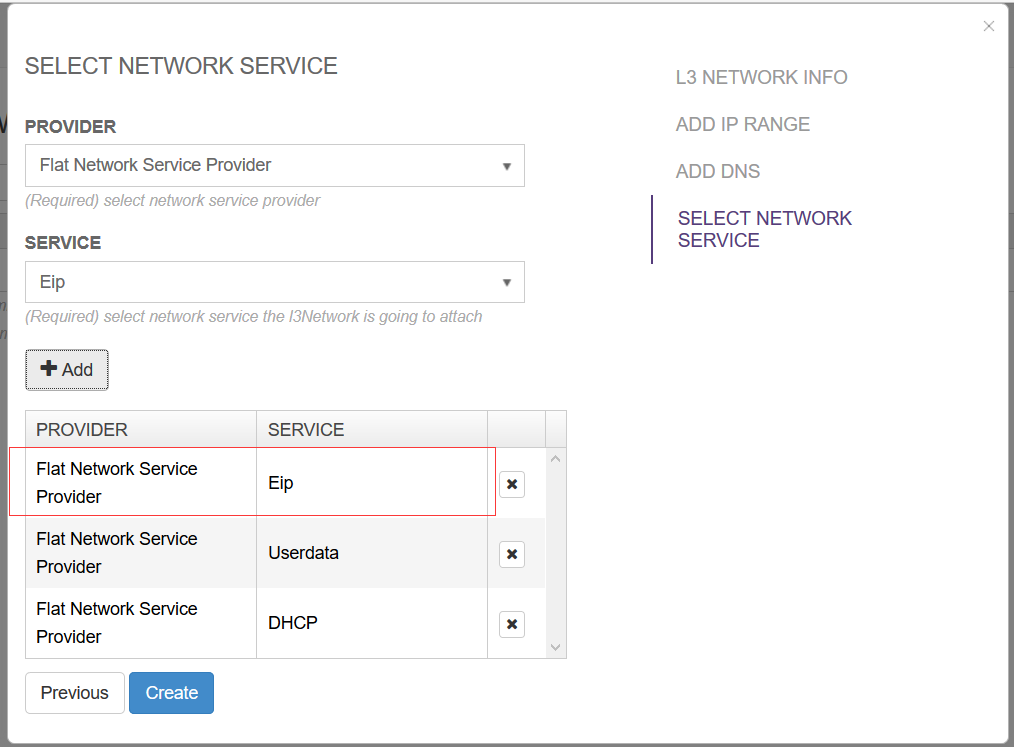
To enable the distributed EIP, users need to select the EIP service of the flat network service provider at the last step of creating a L3 network.
For the usage of EIP, please refer the chapter 15 of the tutorial Amazon EC2 classic EIP zone.
2. Shared Mount Point Primary Storage
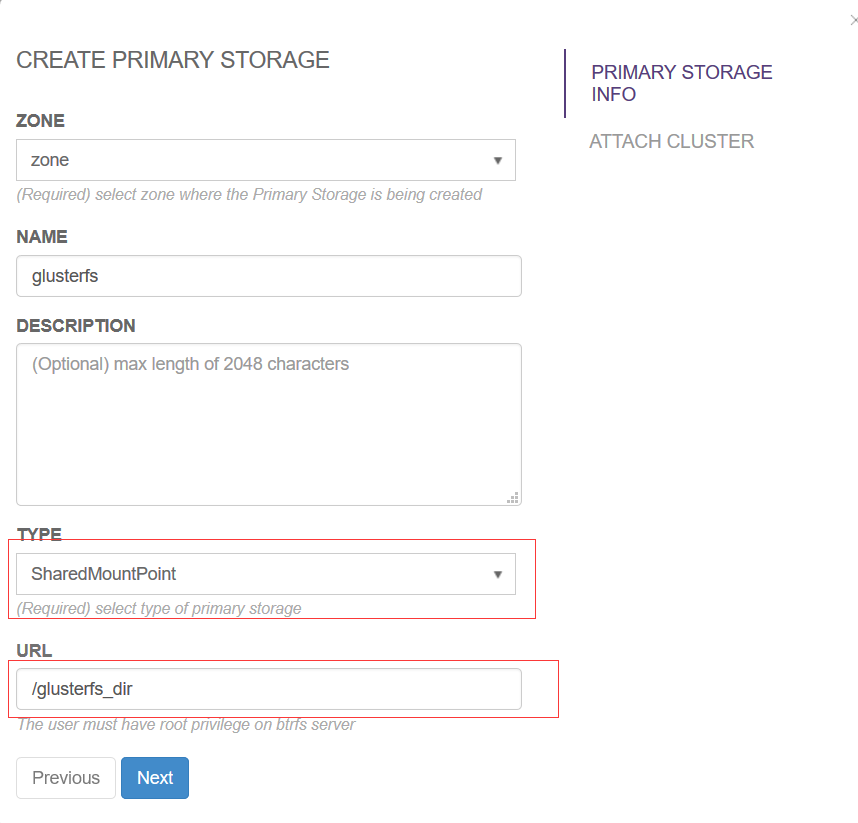
In order to support vast POSIX compatible distributed filesystems, we add a new type of primary storage called shared mount point storage in this version. The idea is that users can use any distributed filesystems(e.g. OCFS2, GlusterFS, MooseFS) as primary storage, as long as those filesystems are pre-mounted on the KVM hosts.
Below is an example of adding a shared mount point primary storage, the URL is the absolute path of the folder where the distributed filesystem is mounted.
we suggest users changing /etc/rc.local or /etc/fstab to make the distributed filesystem automatically mount during Linux booting, otherwise you will be unable to start a created VM or create a VM on your local storage.
3. Database Periodical Backup
In this version, a new command zstack-ctl dump_mysql is added for users to backup ZStack database.
    [root@172-20-12-46 ~]# zstack-ctl dump_mysql -h
    usage: zstackctl dump_mysql [-h] [--file-name FILE_NAME]
                          [--keep-amount KEEP_AMOUNT]

    optional arguments:
    -h, --help            show this help message and exit
    --file-name FILE_NAME
                        The filename you want to save the database, default is
                        'zstack-backup-db'
    --keep-amount KEEP_AMOUNT
                        The amount of backup files you want to keep, older
                        backup files will be deleted, default number is 60
Once the all-in-one installation is done, a crontab task is created as following to periodically backup your database:
30 0,12 * * * zstack-ctl dump_mysql --keep-amount 14
you can change the setting by crontab -e.
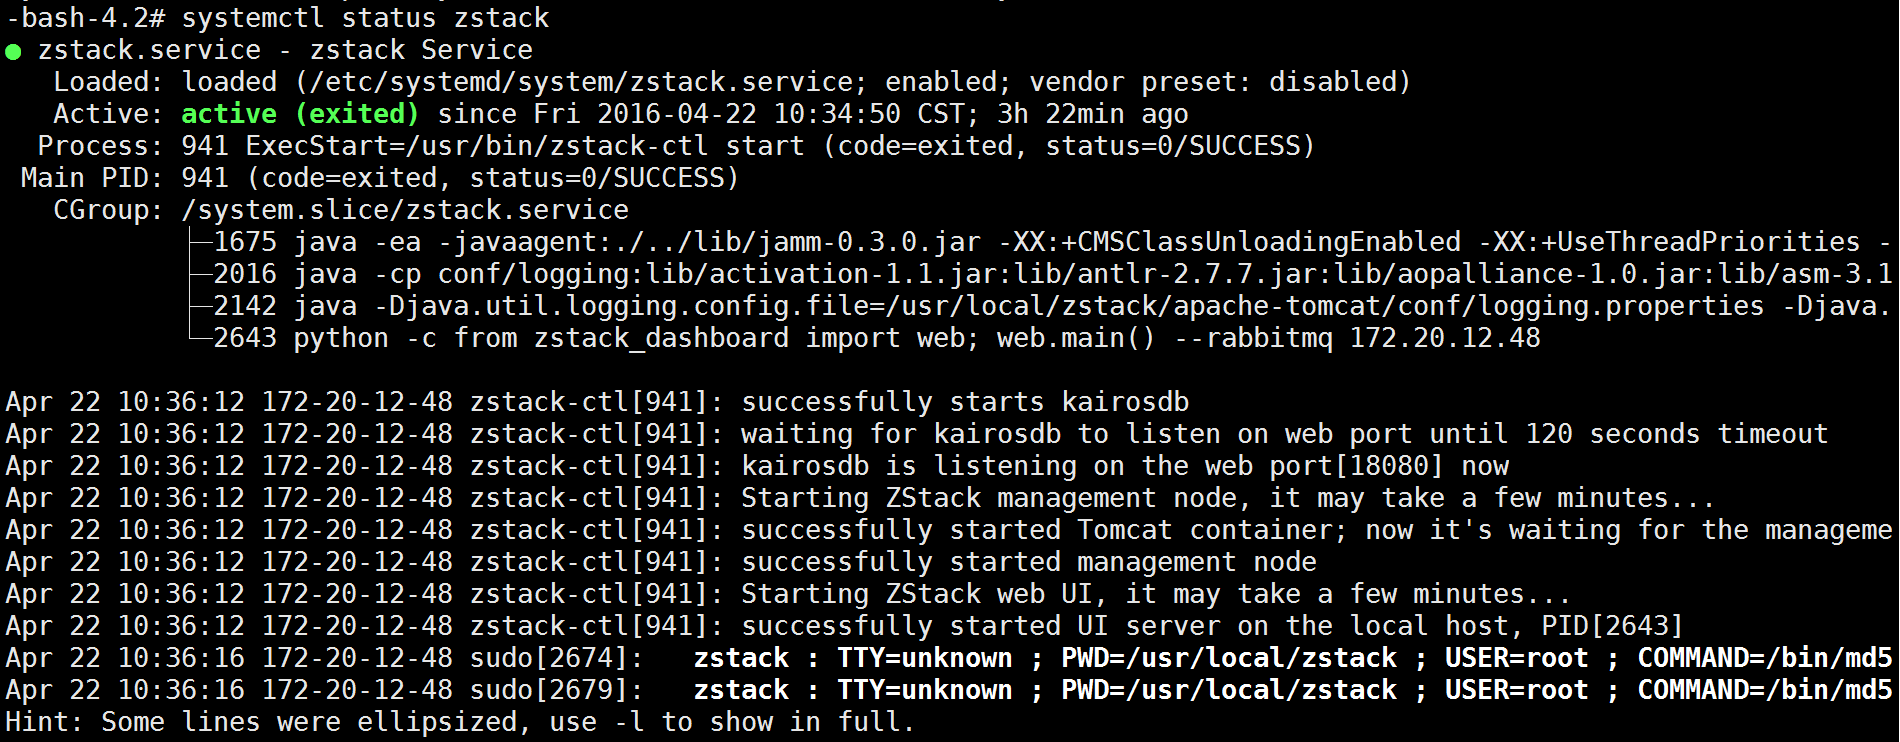
4. Systemd Support
Systemd is supported in this version. You can use systemctl to control ZStack management nodes' lifecycle and make them start during Linux booting.
5. KVM Cache Mode
In this version, users can configure the cache mode of volumes on the KVM hosts by a global configuration. There are three modes supported now:
none: With caching mode set to none, the host page cache is disabled, but the disk write cache is enabled for the guest. In this mode, the write performance in the guest is optimal because write operations bypass the host page cache and go directly to the disk write cache. If the disk write cache is battery-backed, or if the applications or storage stack in the guest transfer data properly (either through fsync operations or file system barriers), then data integrity can be ensured. However, because the host page cache is disabled, the read performance in the guest would not be as good as in the modes where the host page cache is enabled, such as writethrough mode.
writeback: With caching set to writeback mode, both the host page cache and the disk write cache are enabled for the guest. Because of this, the I/O performance for applications running in the guest is good, but the data is not protected in a power failure. As a result, this caching mode is recommended only for temporary data where potential data loss is not a concern.
writethrough: writethrough mode is the default caching mode. With caching set to writethrough mode, the host page cache is enabled, but the disk write cache is disabled for the guest. Consequently, this caching mode ensures data integrity even if the applications and storage stack in the guest do not transfer data to permanent storage properly (either through fsync operations or file system barriers). Because the host page cache is enabled in this mode, the read performance for applications running in the guest is generally better. However, the write performance might be reduced because the disk write cache is disabled.
For details of KVM cache mode you can refer here.
The global configuration can be changed through UI or command line:

>>UpdateGlobalConfig category=kvm name=vm.cacheMode value=writethrough
6. AWS EC2 Way To Access Userdata
Beginning at the version 1.0, ZStack supports AWS EC2 userdata with cloud-init. However, the original way to access userdata is CloudStack like, which requires users to change the default configuration of cloud-init package and sometimes make people confused. In this version, ZStack starts using AWS EC2 way to distribute userdata, which means users can access userdata/metadata by a special IP address(169.254.169.254). It's also the default way that cloud-init fetches userdata, so users can directly use cloud-init built-in packages from CentOS and Ubuntu, without any modification.
7. Installation
You can install the 1.2 release by:
    wget http://download.zstack.org/releases/1.2/1.2.0/zstack-installer-1.2.0.bin
    bash zstack-installer-1.2.0.bin
8. Upgrade
You can upgrade your previous ZStack to 1.2 by:
    wget http://download.zstack.org/releases/1.2/1.2.0/zstack-installer-1.2.0.bin
    bash zstack-installer-1.2.0.bin -u